Getting started
Requirements
- Go 1.26+
- Docker (a running daemon is required; the control plane and agent talk to the Docker Engine API directly and never shell out to the
dockerCLI) - Node.js and npm (only if building the frontend from source; a recent LTS release works, no pinned version)
Build and run
The control plane and node agent are separate Go binaries:
# control plane
go build ./cmd/levelrail

# node agent
go build ./cmd/levelrail-agent
There's also a CLI, a thin scriptable HTTP client for the control plane's API:
go build ./cmd/levelrail-cliFrontend
The frontend lives in web/ as a separate Vite project. It's embedded into the control plane binary via embed.FS at build time, so production deployments don't run a separate Node process.
cd web
npm install
npm run dev       # Vite dev server
npm run build      # type-check and produce a production build in dist/
See web/README.md for lint, format, typecheck, preview, and other commands plus conventions.
The control plane binary listens on :8080 by default.
Deploy your first app
The app spec is the one declarative file you write in your app's repo: app.yaml (also discovered as app.yml, deploy.yaml, or deploy.yml). A minimal one looks like this:
version: 1
services:
  web:
    build:
      type: dockerfile
    port: 8080
Example app
test/fixtures/hello-e2e/Dockerfile in this repo is a real, working example: a tiny busybox image that listens on port 8080 and serves a static response. The end-to-end deploy test builds, deploys, and checks an HTTPS response against it. This is a genuine, exercised path, not hypothetical.
The full spec, with domains, health checks, resource limits, env, replicas, and deploy strategy, is documented in docs/app-spec-reference.md.
Setting up an admin account
Before you can deploy anything, the control plane needs an admin account. Choose one of three options:
- Register through the frontend on first run.
- Set
APP_ADMIN_USERNAMEandAPP_ADMIN_PASSWORDbefore starting. - Start the control plane with
APP_DEV_MODE=1(dev mode only, never production).
Dev mode bootstraps a fixed dev/dev admin account and fixed API tokens from dev-fixtures.yml at the repo root. This lets you skip the register-then-mint-a-token steps. A release build (-tags embedweb) ignores APP_DEV_MODE outright, so it cannot run in dev mode.
Creating an app from the CLI
With the control plane running in dev mode and levelrail-cli built, create and deploy an app in one command:
APP_API_TOKEN=dev-root-token ./levelrail-cli apps create \
  --name your-app \
  --file app.yaml \
  --repo https://github.com/your-org/your-app \
  --image-repo registry.example.com/your-org/your-app
This creates the app and triggers a real BuildKit build from the git repository you point it at.
Check on it with:
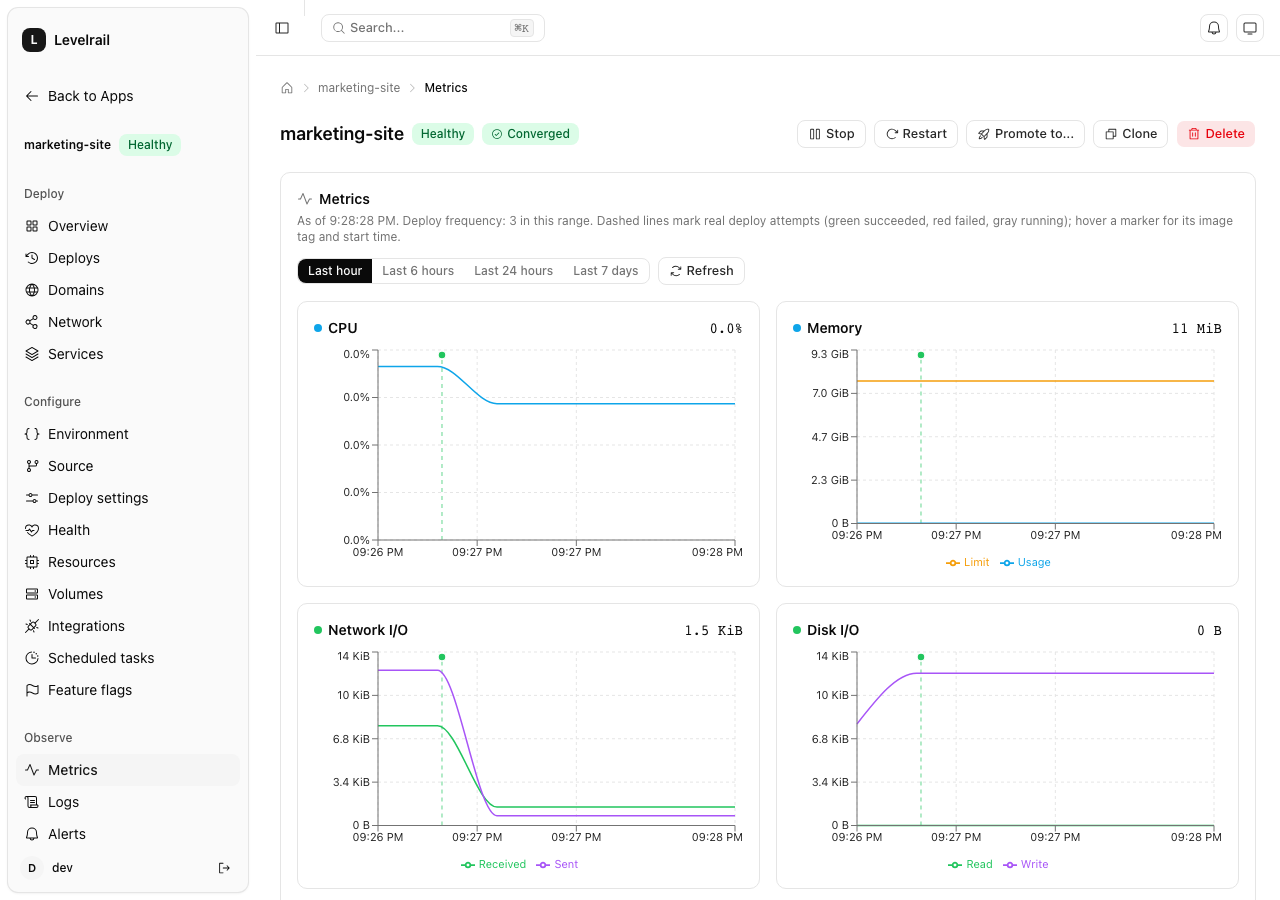
APP_API_TOKEN=dev-root-token ./levelrail-cli apps status your-appOnce deployed, the dashboard shows live metrics and deploy history in one view:
Using a prebuilt image
If you already have a built image and don't need Levelrail to build it, skip --file/--repo/--image-repo and use the existing-image path instead:
APP_API_TOKEN=dev-root-token ./levelrail-cli apps create \
  --name your-app --image registry.example.com/your-org/your-app:latest --port 8080
Other CLI commands
Run levelrail-cli apps create -h for the full set of flags.
Other common commands:
apps deploy- deploy an appapps rollback- revert to a previous versionapps restart- restart running containersapps logs(add--followor-fto tail live)apps metrics- view app metricsdatabases create- create a databasedatabases metrics- view database metricsnodes metrics- view node metrics
Run levelrail-cli -h for the complete list of commands.
Guided setup for apps
Don't want to hand-write app.yaml or look up every flag first? Run the wizard instead:
./levelrail-cli apps create --interactiveThe wizard prompts for:
- App name
- Source (git repository URL or existing Docker image reference)
- Container port
- Optional domain
- Optional health check path (defaults to
/healthz) - Optional memory/CPU limits
- Whether to write to
app.yamlor create the app directly against the control plane API
Short form: -i (cannot be combined with --name/--image/--repo/--file).
WARNING
This wizard only creates single-service apps (exactly one entry under services:). For multi-service apps (a web process plus a worker sidecar under one app.yaml), hand-write multiple entries in app.yaml's services: map, or use POST /api/v1/apps/{name}/deploy-spec (and its dashboard equivalent, an app's Services tab). See docs/roadmap.md for current caveats.
Guided setup for databases
databases create has the same guided mode:
./levelrail-cli databases create --interactiveThe wizard prompts for:
- Database name
- Engine (from the live registry at
GET /api/v1/database-engines; newly added engines appear automatically) - Version (defaults to the engine's suggested version)
- Optional memory/CPU limits
- Whether to expose it outside the Docker network
- Optional backup schedule
Unlike the apps wizard, this one always creates the database against the control plane API. app.yaml's databases: block has no field for resource limits or public access, so there is no file-output mode.
Short form: -i (cannot be combined with --name/--engine/--version).
Output formats and filtering
Every command accepts --output json|table|text and --query EXPR alongside --token, --api-url, --profile, and --json flags.
Output formats:
table(default, human-readable)text(plain tab-separated, no headers, for piping throughawk/cut)--json(shorthand for--output json, preserved for backward compatibility)
The --query flag takes a JMESPath expression to filter or project results in any format (same feature AWS CLI users know):
# every app's name, whatever node it's running on
./levelrail-cli apps list --query "[].name"

# just the apps on a specific node
./levelrail-cli apps list --query "[?node_id=='node-1'].name"

# a single field off a single app, with no JSON wrapper
./levelrail-cli apps get your-app --query image --output text
Note: apps list returns a bare JSON array (not wrapped in an "apps" key), so expressions index straight into it rather than starting with apps[...].
Run levelrail-cli <command> -h to see --output and --query flags for any command.
Shell completion
levelrail-cli can generate completion scripts for bash, zsh, or fish. Coverage includes every command and subcommand plus global flags (--token, --api-url, --json, --output, --query, --help). It does not complete flag values or positional arguments like app names.
Bash
source <(levelrail-cli completion bash)To install permanently:
levelrail-cli completion bash | sudo tee /etc/bash_completion.d/levelrail-cli > /dev/nullZsh
source <(levelrail-cli completion zsh)To install permanently, save as _levelrail-cli somewhere on $fpath:
levelrail-cli completion zsh > "${fpath[1]}/_levelrail-cli"Fish
levelrail-cli completion fish | sourceTo install permanently:
levelrail-cli completion fish > ~/.config/fish/completions/levelrail-cli.fishRun levelrail-cli completion -h for the same instructions from the CLI itself.
Where to go next
- docs/architecture.md: how the control plane, the node agent, and the reconciler fit together.
- docs/app-spec-reference.md: the full
app.yamlschema. - docs/domains-and-ingress.md: why there's no reverse proxy to set up, and how to get your first domain live over HTTPS.
- docs/comparison.md: how Levelrail's approach differs from Coolify, Dokploy, CapRover, Dokku, and Kamal.
- docs/roadmap.md: what's shipped, what's in progress, and what's not started yet.
- docs/master-key-rotation.md: rotating the envelope-encryption master key.
- CHANGELOG.md: what changed between releases.